> ## Documentation Index
> Fetch the complete documentation index at: https://opensource.weam.ai/docs/llms.txt
> Use this file to discover all available pages before exploring further.
# Brains
Brains are organized knowledge spaces within your workspace that store and manage all your AI interactions, documents, agents, and prompts.
They help teams maintain clear boundaries between different projects while enabling seamless collaboration.
## Understanding Brains
Brains serve as dedicated containers for:
* **AI Conversations**: Chat histories and interactions
* **Knowledge Base**: Uploaded documents and files
* **Agents**: Specialized AI assistants
* **Prompts**: Conversation templates and starters
* **Team Collaboration**: Shared resources and workflows
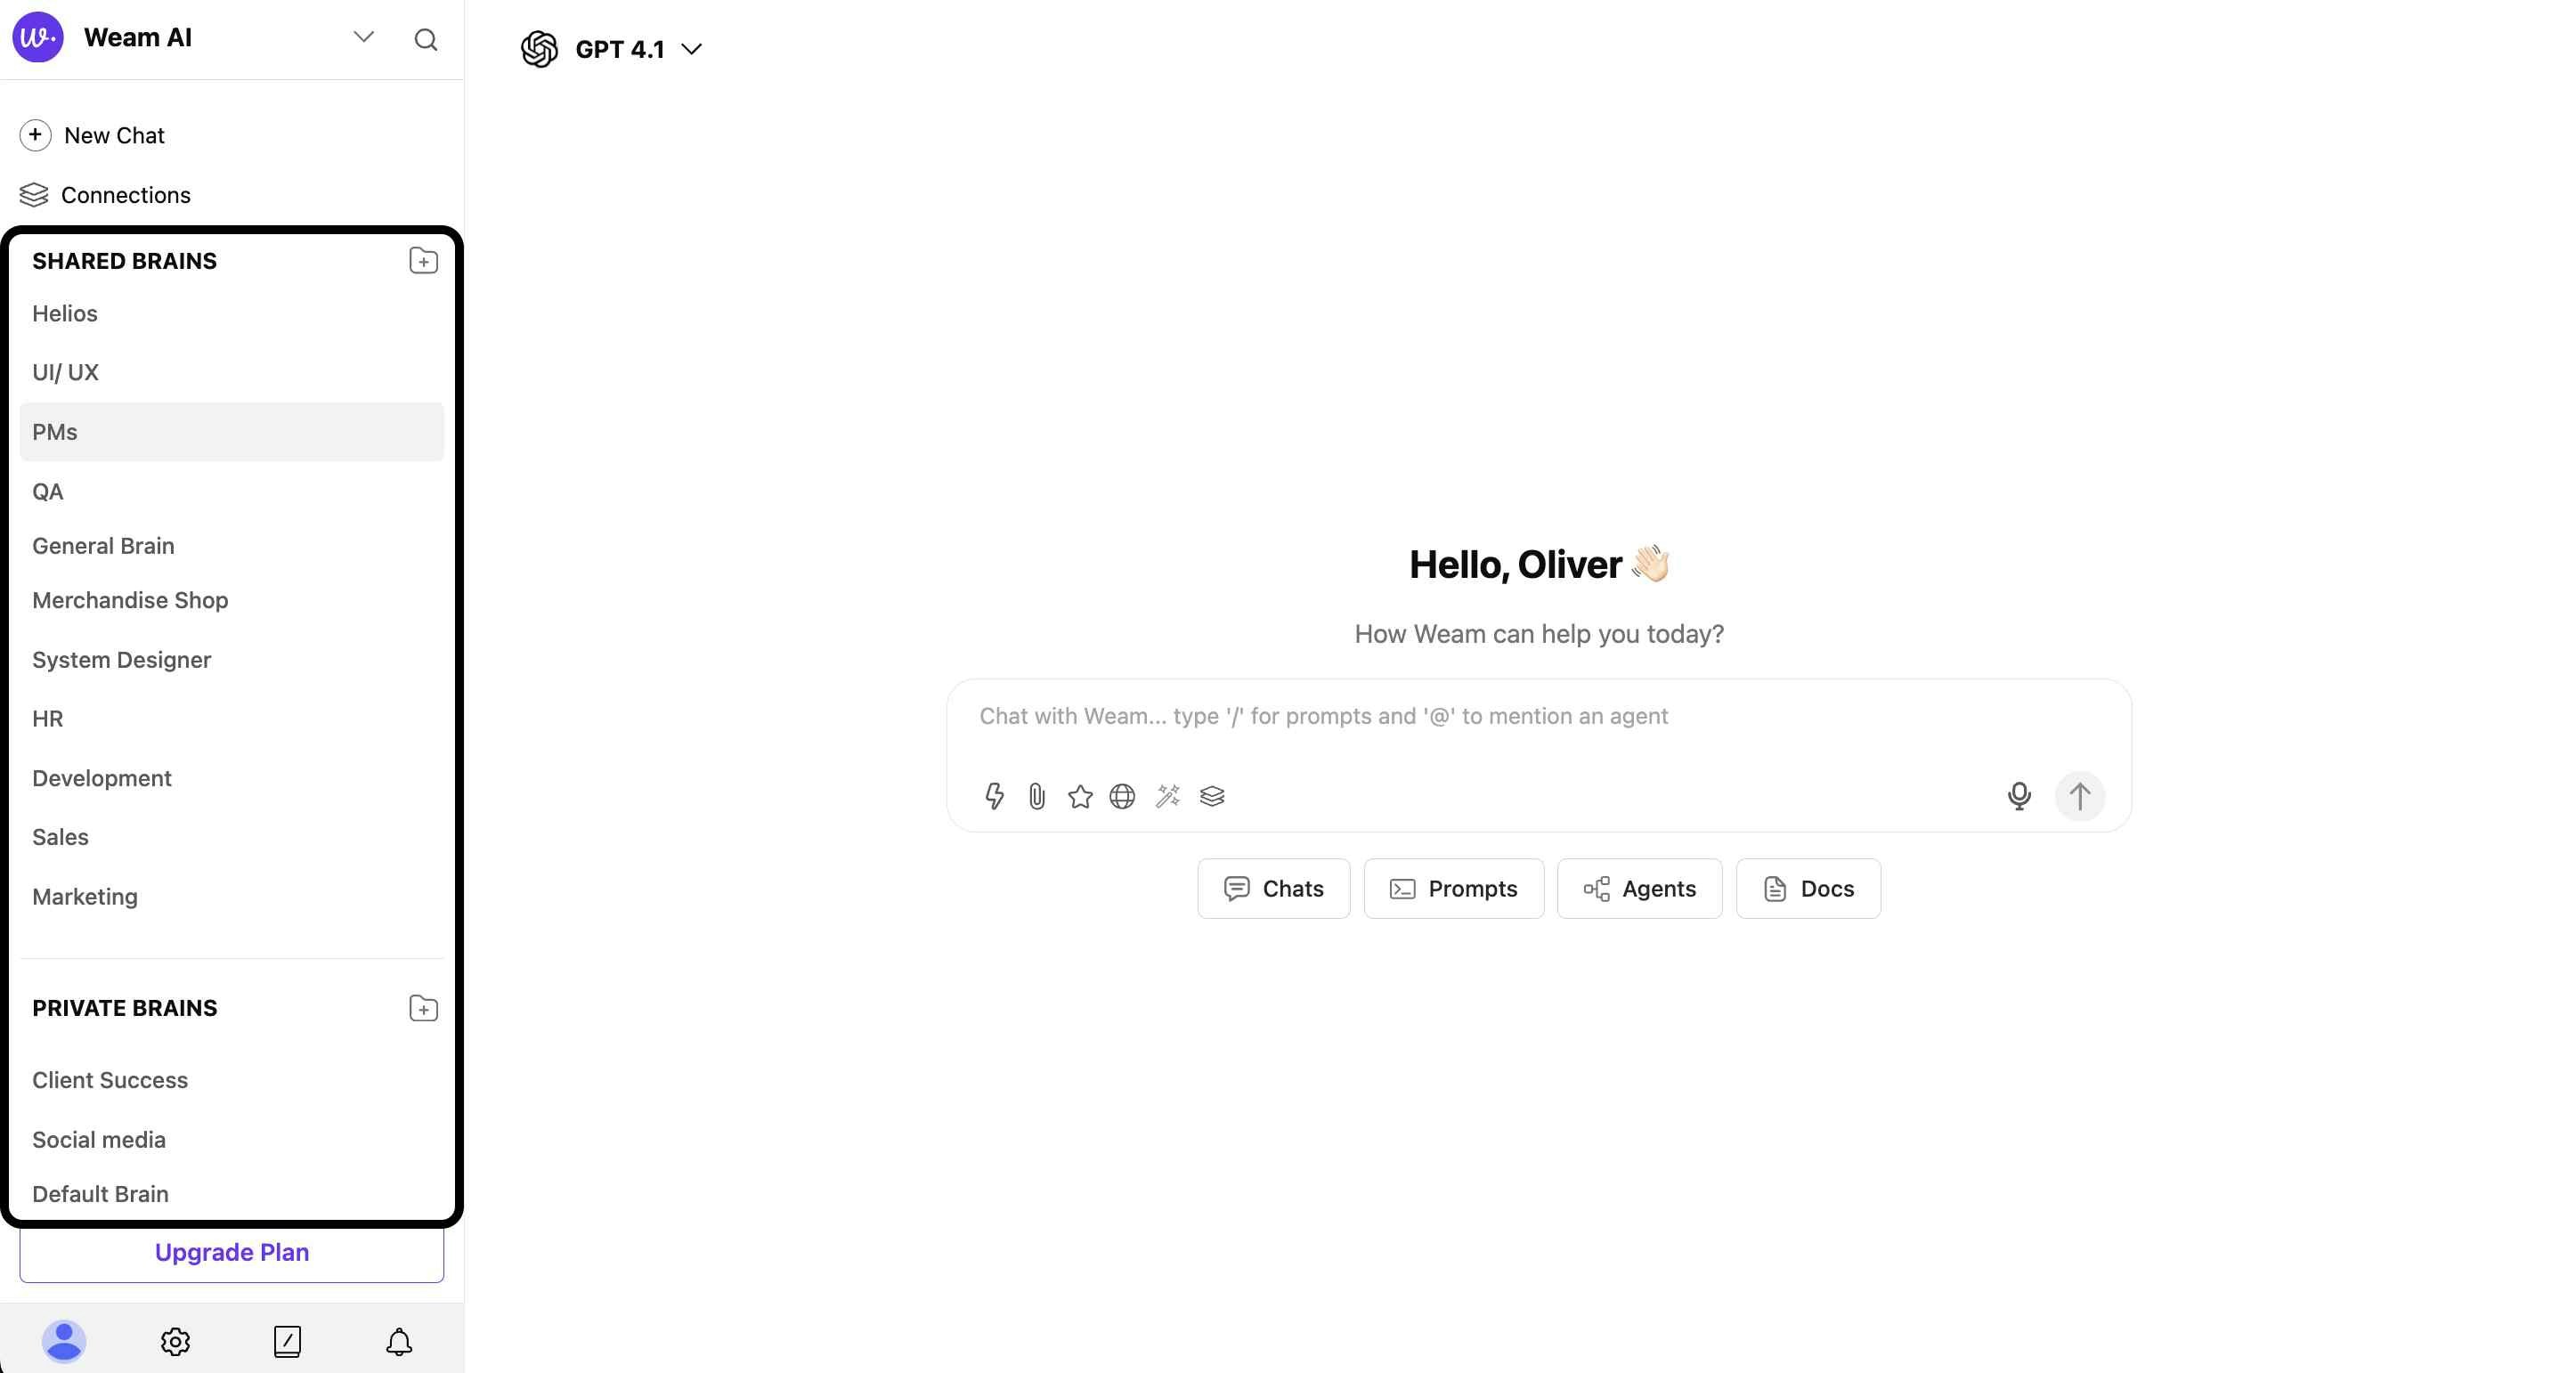
### Brain Organization
The sidebar displays Brains in two main categories:
* **SHARED BRAINS**: Team collaboration spaces
* **PRIVATE BRAINS**: Individual workspaces
 ## Shared Brains
### Purpose and Features
Shared Brains are collaborative knowledge centers designed for team collaboration, providing:
* **Team Access**: Multiple members can work together on projects
* **Resource Sharing**: Shared agents, prompts, and documents
* **Collective Knowledge**: Combined team insights and interactions
* **Project Organization**: Dedicated spaces for specific initiatives
## Shared Brains
### Purpose and Features
Shared Brains are collaborative knowledge centers designed for team collaboration, providing:
* **Team Access**: Multiple members can work together on projects
* **Resource Sharing**: Shared agents, prompts, and documents
* **Collective Knowledge**: Combined team insights and interactions
* **Project Organization**: Dedicated spaces for specific initiatives
 ### Creating a Shared Brain
#### Step 1: Access Creation
1. Navigate to the "SHARED BRAINS" section in the sidebar
2. Click the "+" icon next to "SHARED BRAINS"
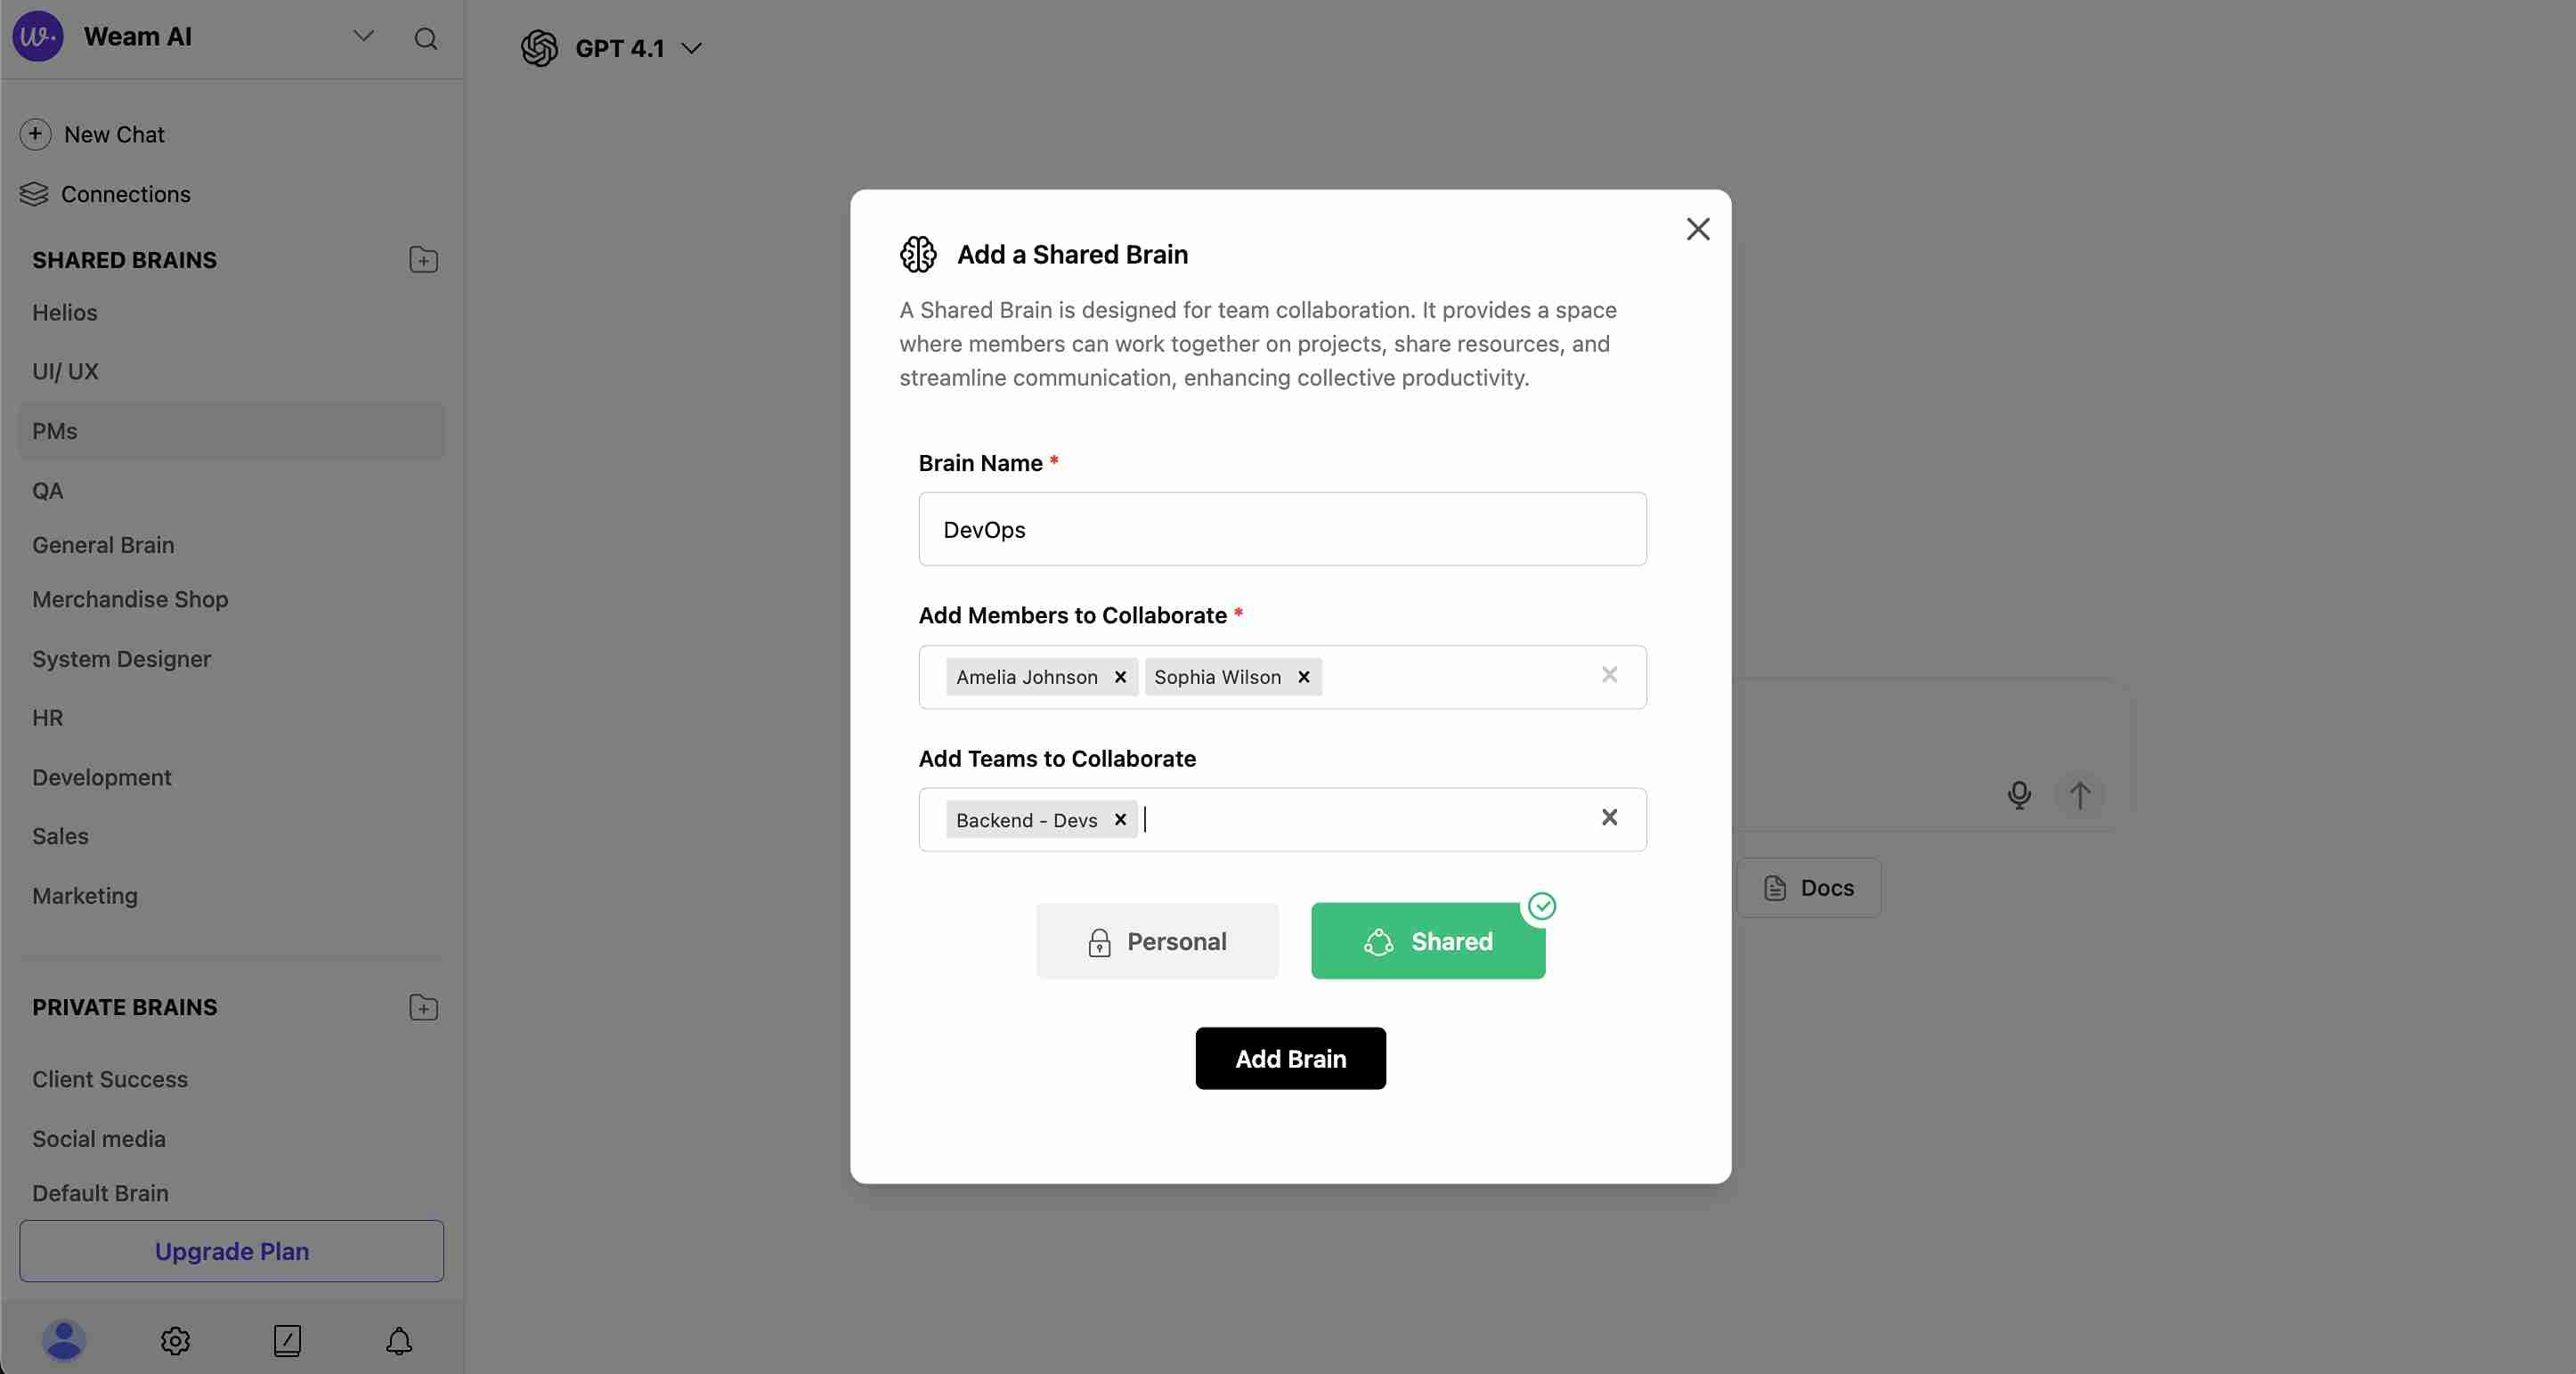
3. The "Add a Shared Brain" modal will appear
#### Step 2: Configure Brain Settings
**Brain Name** (Required)
* Enter a descriptive name for your Brain
* Choose names that clearly identify the purpose or team
**Add Members to Collaborate**
* Search and select individual team members
* Multiple members can be added
* Remove members using the "x" next to their names
**Add Teams to Collaborate**
* Include entire teams (e.g., "Backend - Devs")
* Select from existing organizational teams
* Teams can be removed using the "x" next to team names
#### Step 3: Set Brain Type
* Toggle between "Personal" and "Shared"
* **Shared** option creates team-accessible Brain
* Selected option determines access permissions
#### Step 4: Finalize Creation
* Review all selected members and teams
* Click "Add Brain" to create the Shared Brain
* The new Brain appears in your SHARED BRAINS list
### Default Shared Brain
Every user automatically receives a Shared Brain named "General Brain" upon workspace setup.
## Private Brains
### Purpose and Features
Private Brains provide individual workspace for:
* **Personal Projects**: Individual work and experimentation
* **Idea Development**: Testing concepts before team sharing
* **Learning Environment**: Personal AI skill development
* **Preliminary Work**: Refining ideas and prompts privately
### Creating a Shared Brain
#### Step 1: Access Creation
1. Navigate to the "SHARED BRAINS" section in the sidebar
2. Click the "+" icon next to "SHARED BRAINS"
3. The "Add a Shared Brain" modal will appear
#### Step 2: Configure Brain Settings
**Brain Name** (Required)
* Enter a descriptive name for your Brain
* Choose names that clearly identify the purpose or team
**Add Members to Collaborate**
* Search and select individual team members
* Multiple members can be added
* Remove members using the "x" next to their names
**Add Teams to Collaborate**
* Include entire teams (e.g., "Backend - Devs")
* Select from existing organizational teams
* Teams can be removed using the "x" next to team names
#### Step 3: Set Brain Type
* Toggle between "Personal" and "Shared"
* **Shared** option creates team-accessible Brain
* Selected option determines access permissions
#### Step 4: Finalize Creation
* Review all selected members and teams
* Click "Add Brain" to create the Shared Brain
* The new Brain appears in your SHARED BRAINS list
### Default Shared Brain
Every user automatically receives a Shared Brain named "General Brain" upon workspace setup.
## Private Brains
### Purpose and Features
Private Brains provide individual workspace for:
* **Personal Projects**: Individual work and experimentation
* **Idea Development**: Testing concepts before team sharing
* **Learning Environment**: Personal AI skill development
* **Preliminary Work**: Refining ideas and prompts privately
 ### Creating a Private Brain
#### Step 1: Access Creation
1. Navigate to the "PRIVATE BRAINS" section in the sidebar
2. Click the "+" icon next to "PRIVATE BRAINS"
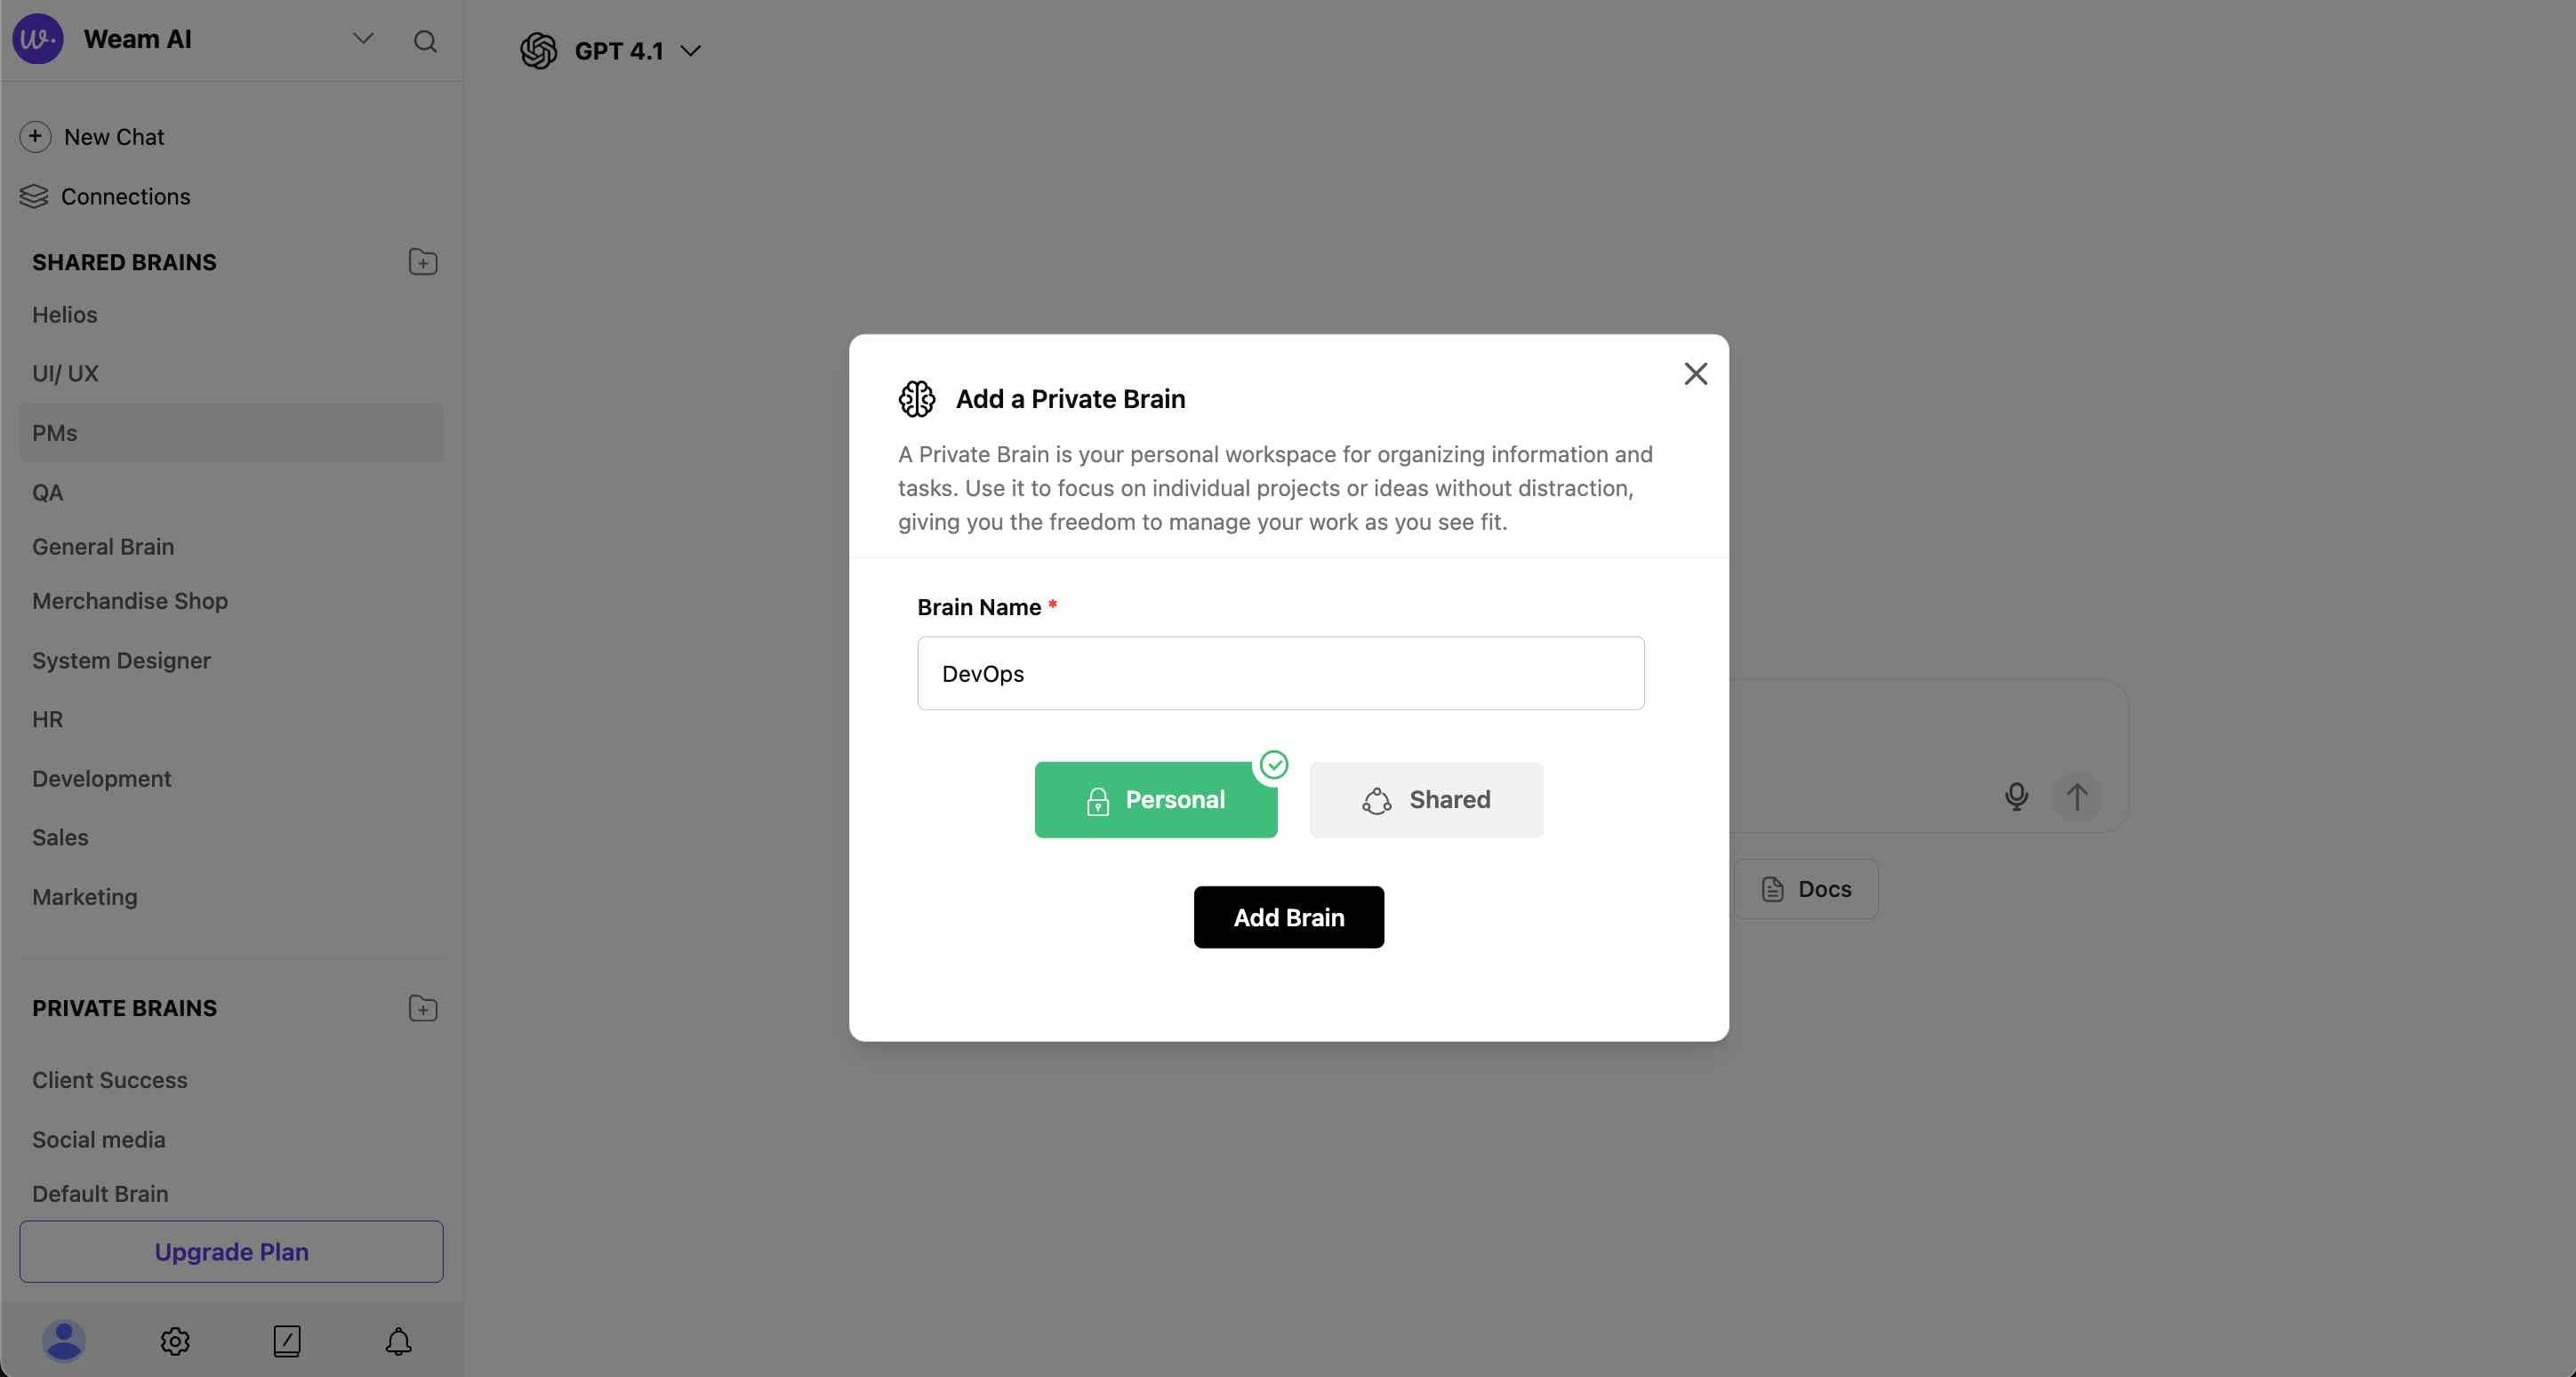
3. The "Add a Private Brain" modal will appear
#### Step 2: Configure Private Brain
**Brain Name** (Required)
* Enter a descriptive name for your private workspace
* Focus on personal project identification
**Brain Type Selection**
* Toggle between "Personal" and "Shared"
* **Personal** option creates individual-only access
* Private Brains are restricted to the creator
#### Step 3: Complete Setup
* No member or team selection needed for Private Brains
* Click "Add Brain" to create your private workspace
* The new Brain appears in your PRIVATE BRAINS list
### Default Private Brain
Every user automatically receives a Private Brain named "Default Brain" upon account creation.
## Brain Management
### Brain Actions and Controls
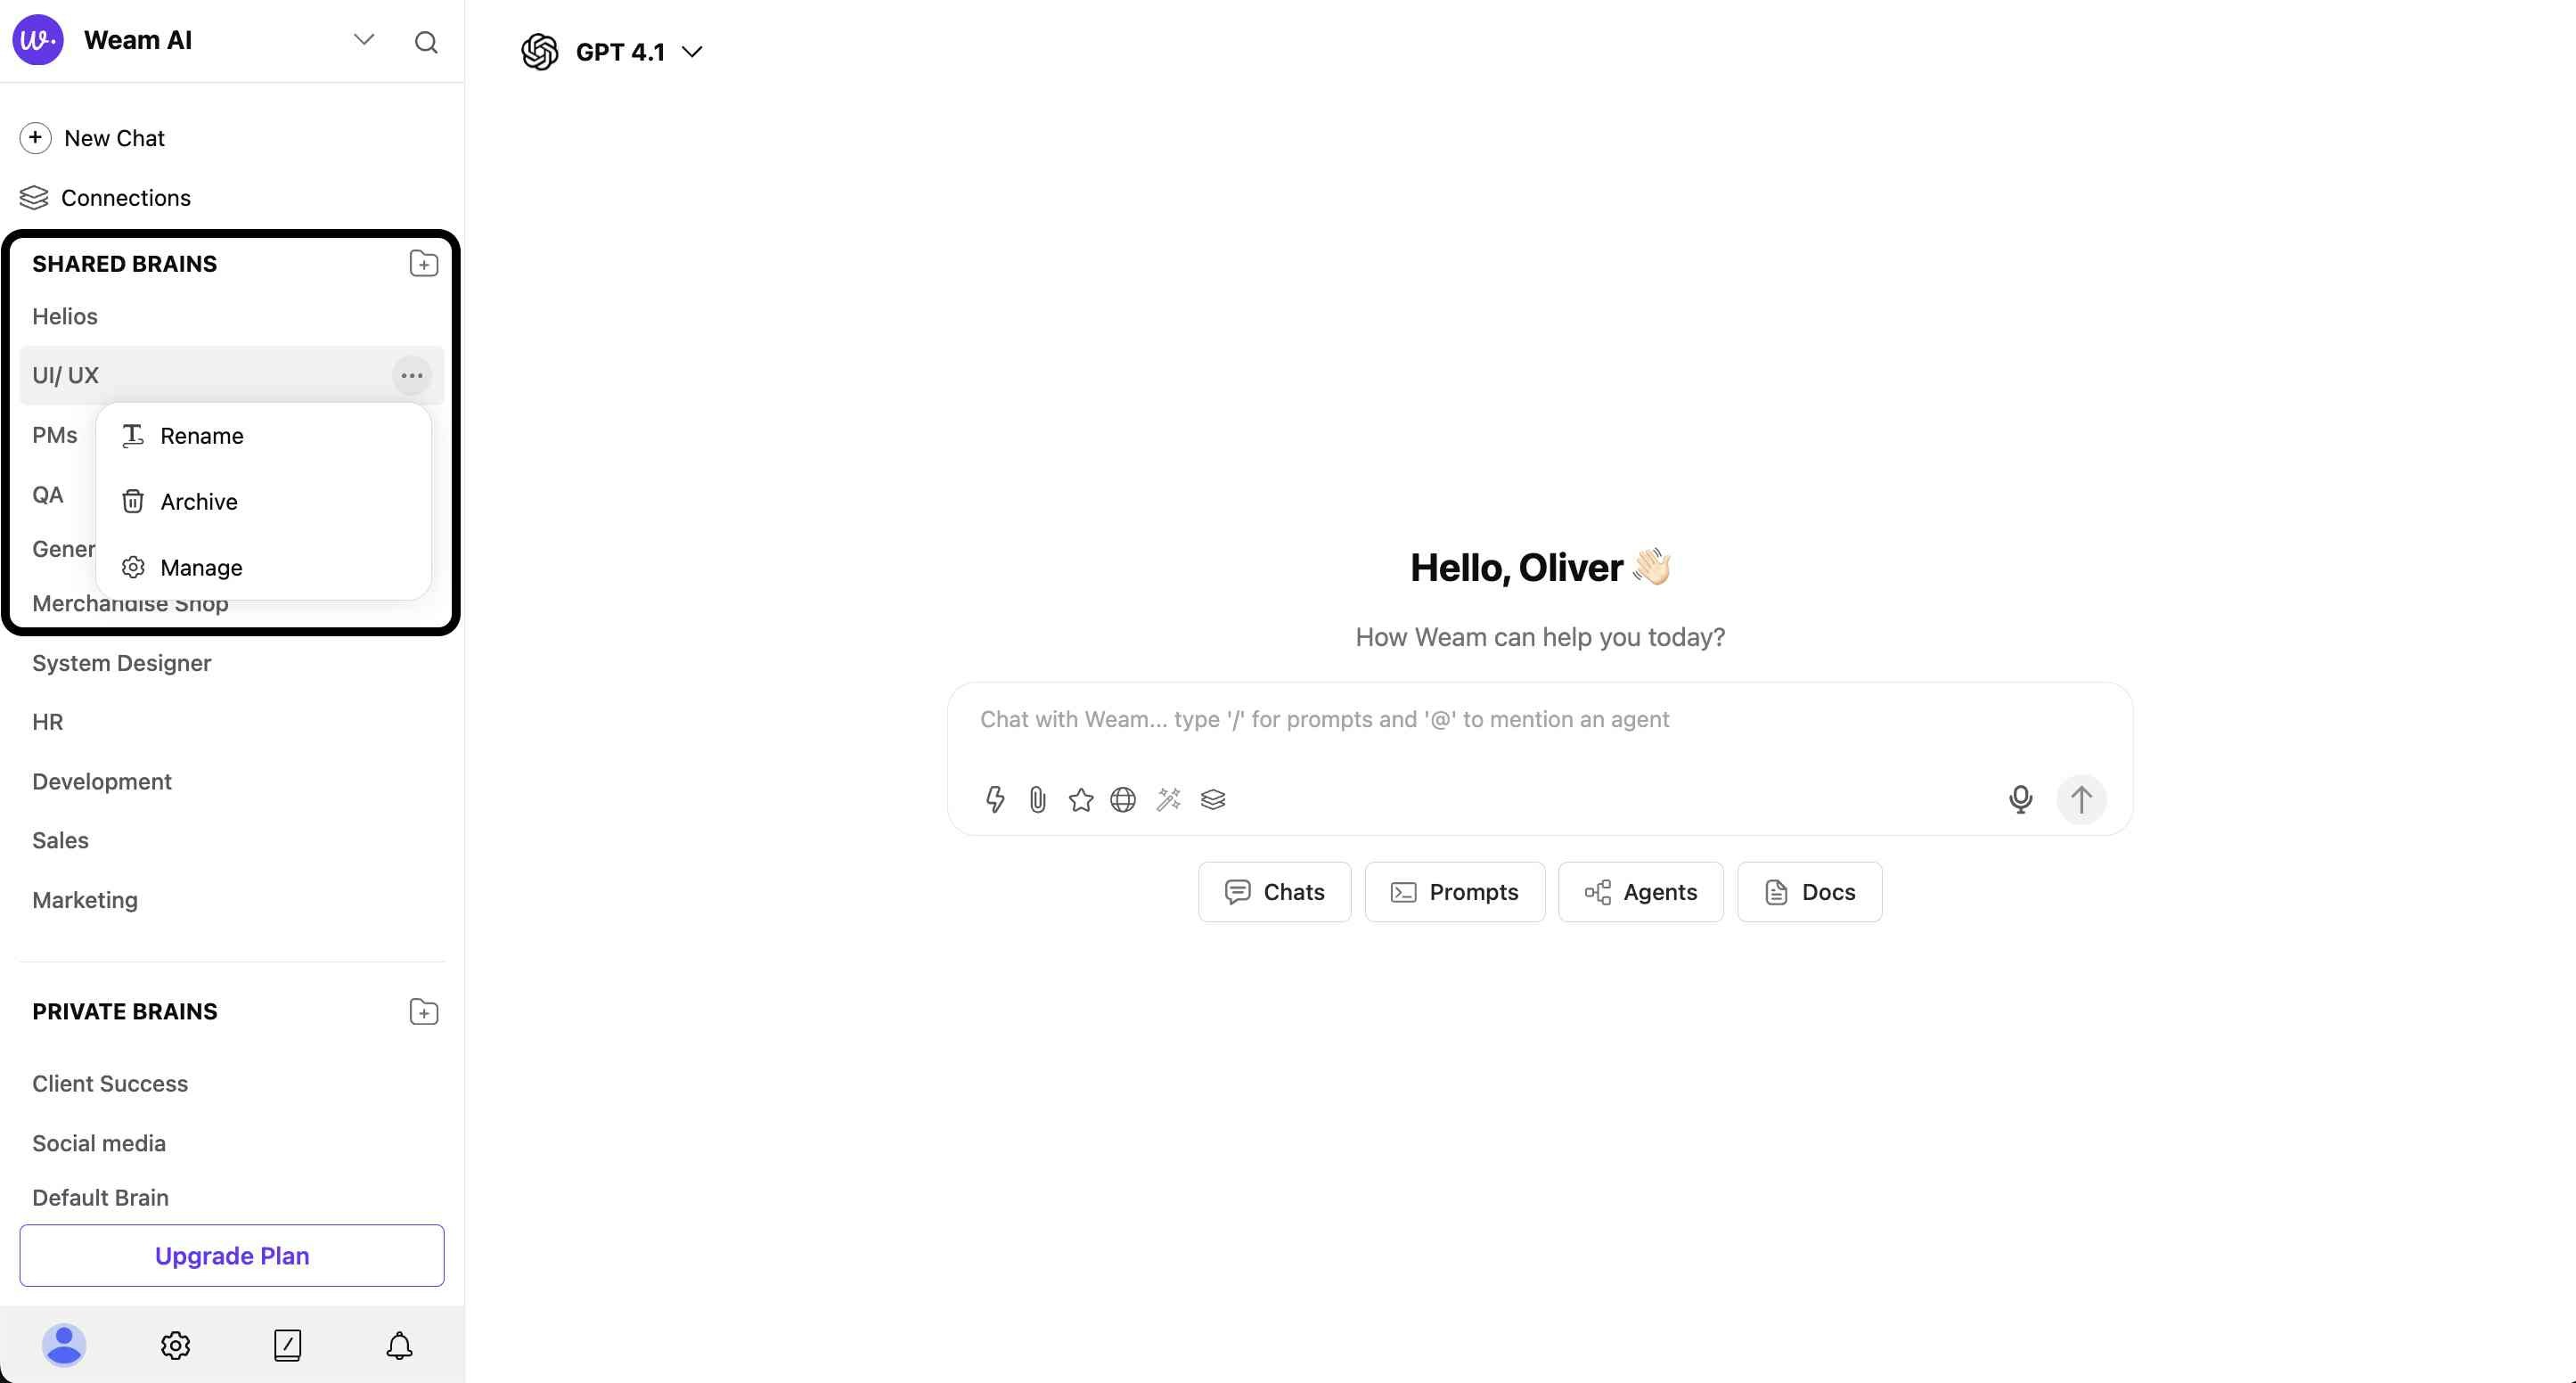
Each Brain has management options accessible through the three-dot menu (⋯) next to the Brain name:
#### Available Actions
* **Rename**: Change the Brain's name to better reflect its purpose
* **Archive**: Move the Brain to archived status (removes from active sidebar)
* **Manage**: Access detailed Brain settings and member management
### Creating a Private Brain
#### Step 1: Access Creation
1. Navigate to the "PRIVATE BRAINS" section in the sidebar
2. Click the "+" icon next to "PRIVATE BRAINS"
3. The "Add a Private Brain" modal will appear
#### Step 2: Configure Private Brain
**Brain Name** (Required)
* Enter a descriptive name for your private workspace
* Focus on personal project identification
**Brain Type Selection**
* Toggle between "Personal" and "Shared"
* **Personal** option creates individual-only access
* Private Brains are restricted to the creator
#### Step 3: Complete Setup
* No member or team selection needed for Private Brains
* Click "Add Brain" to create your private workspace
* The new Brain appears in your PRIVATE BRAINS list
### Default Private Brain
Every user automatically receives a Private Brain named "Default Brain" upon account creation.
## Brain Management
### Brain Actions and Controls
Each Brain has management options accessible through the three-dot menu (⋯) next to the Brain name:
#### Available Actions
* **Rename**: Change the Brain's name to better reflect its purpose
* **Archive**: Move the Brain to archived status (removes from active sidebar)
* **Manage**: Access detailed Brain settings and member management
 ### Brain Details and Member Management
#### Accessing Brain Management
1. Click the three-dot menu (⋯) next to any Brain name
2. Select "Manage" to open the Brain details modal
3. View comprehensive Brain information and controls
#### Brain Information Display
The Brain management modal shows:
* **Brain Name**: Current name with creation details
* **Created By**: Original creator and creation date (e.g., "Oliver Smith on 03-12-2025")
* **Member Count**: Total number of Brain participants (e.g., "Members 3")
* **Archive Option**: Red "Archive" button for Brain archiving
### Brain Details and Member Management
#### Accessing Brain Management
1. Click the three-dot menu (⋯) next to any Brain name
2. Select "Manage" to open the Brain details modal
3. View comprehensive Brain information and controls
#### Brain Information Display
The Brain management modal shows:
* **Brain Name**: Current name with creation details
* **Created By**: Original creator and creation date (e.g., "Oliver Smith on 03-12-2025")
* **Member Count**: Total number of Brain participants (e.g., "Members 3")
* **Archive Option**: Red "Archive" button for Brain archiving
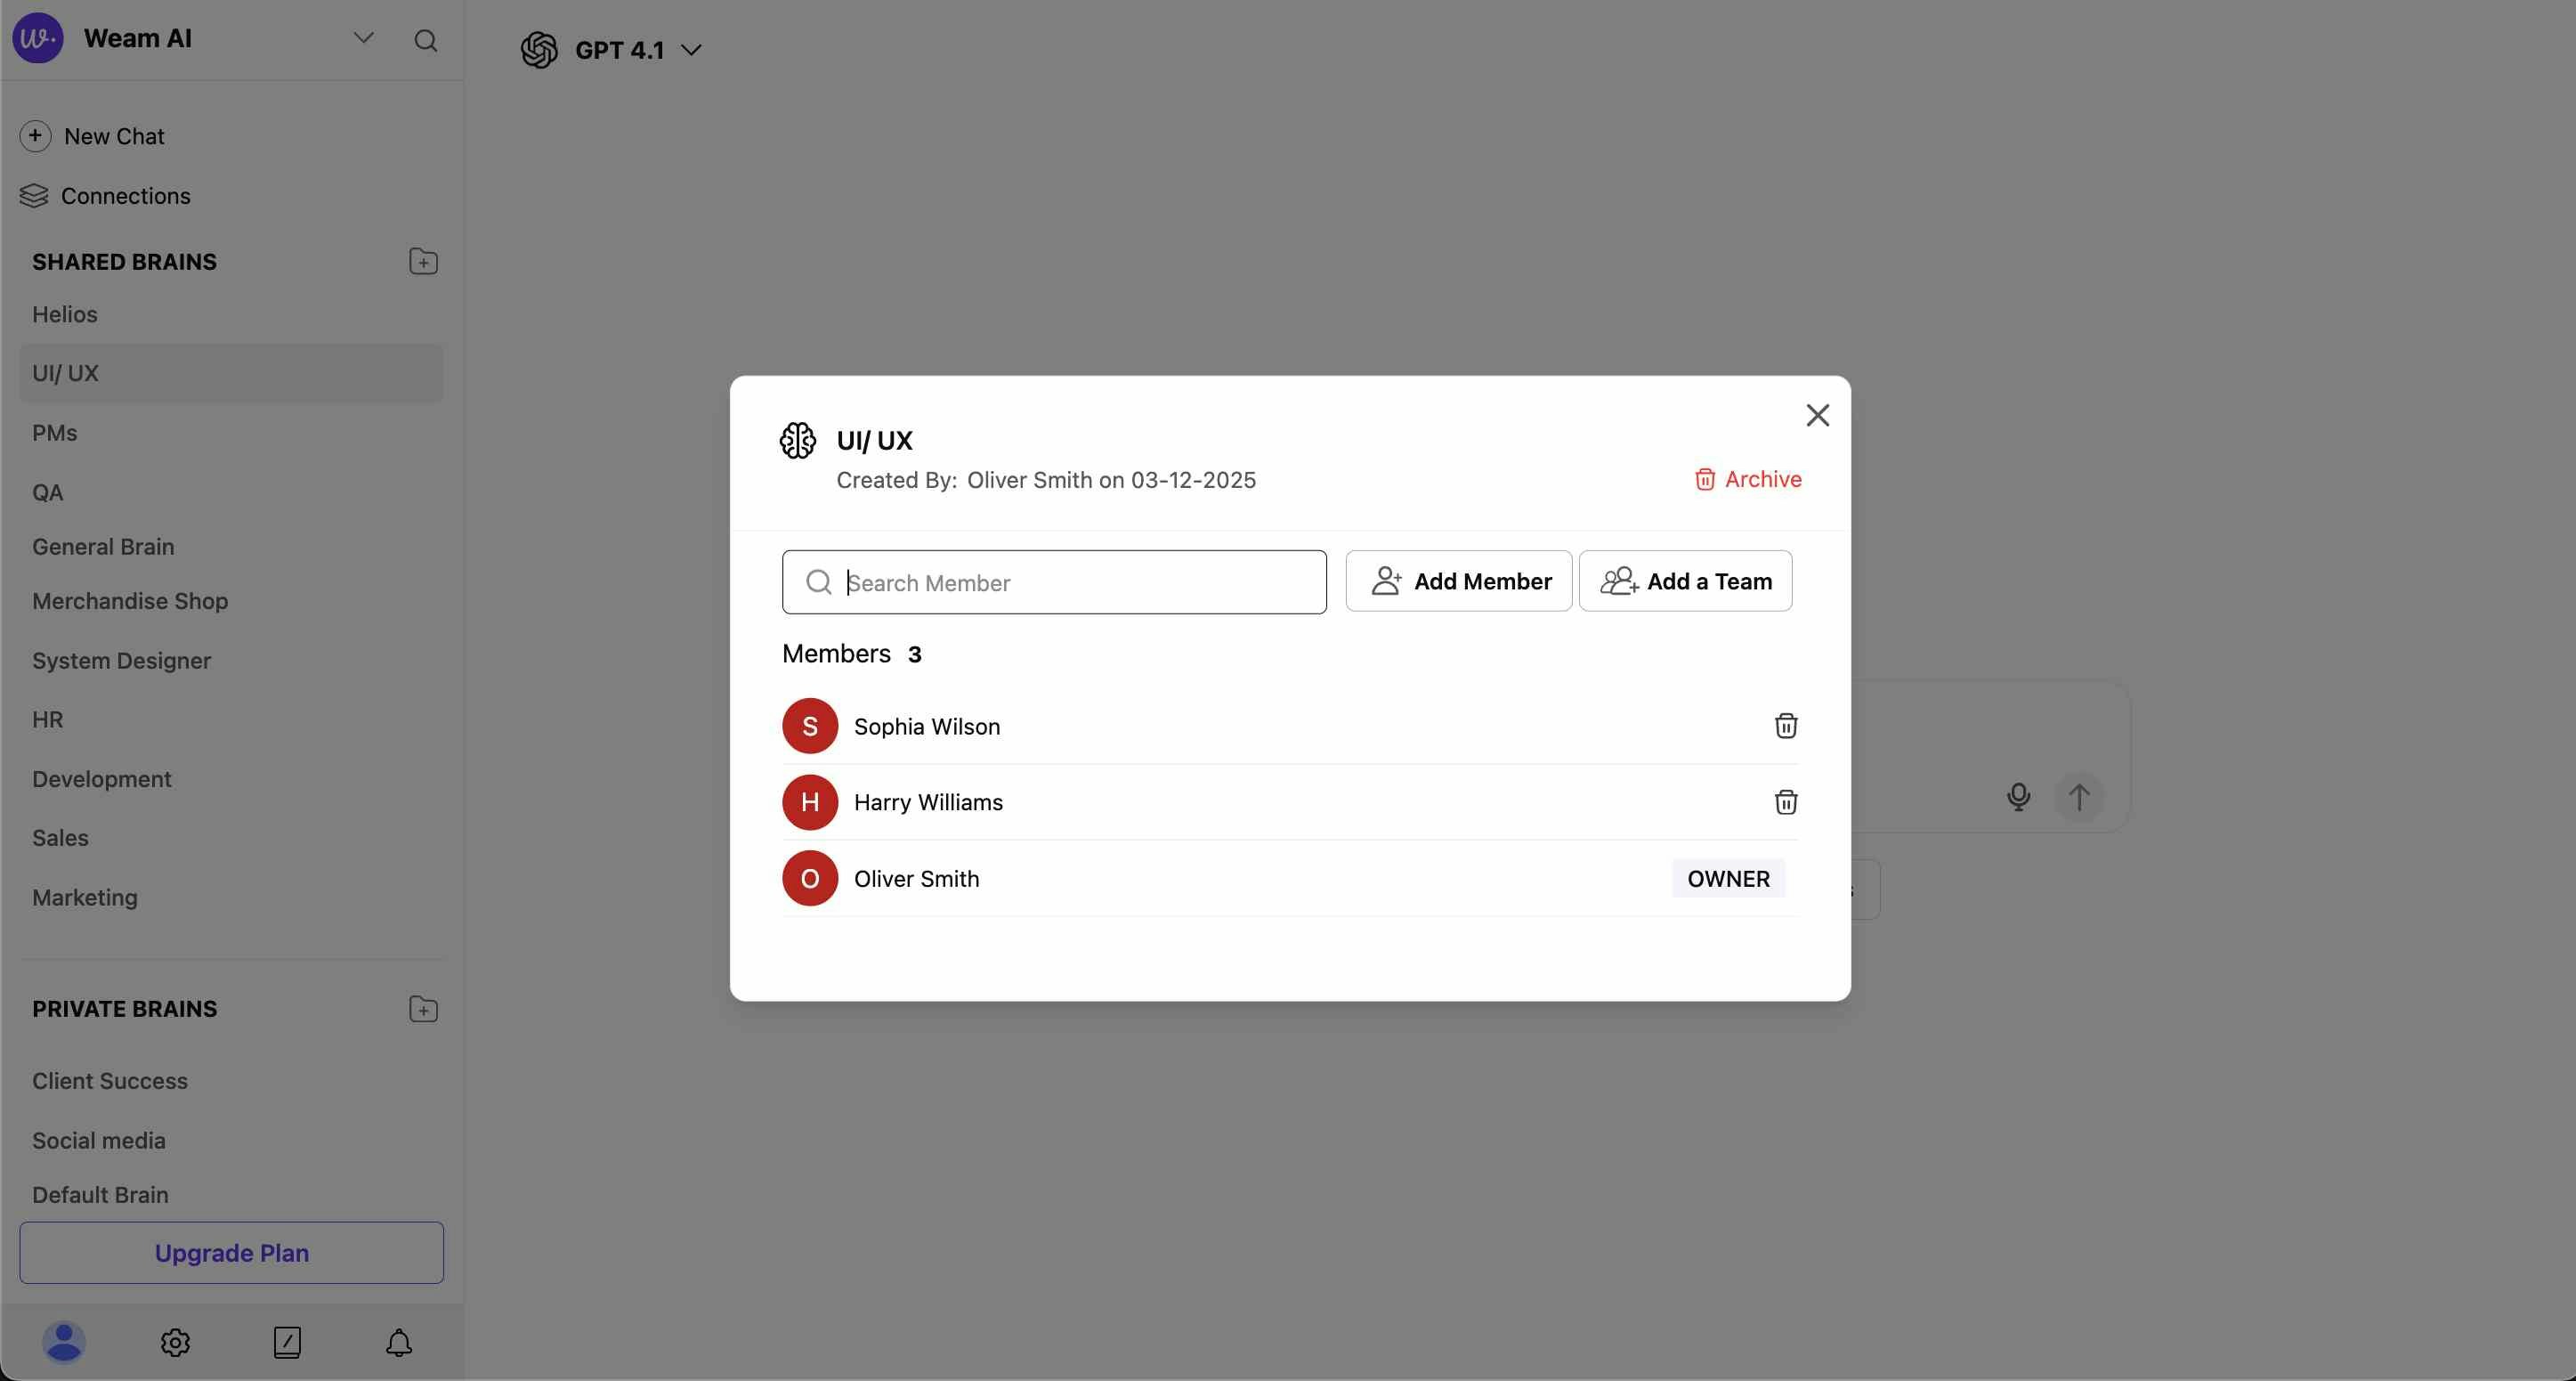 #### Member Management Features
**Add New Members**
* **Search Members**: Use search bar to find specific users
* **Add Member**: Button to include individual users
* **Add a Team**: Button to include entire teams
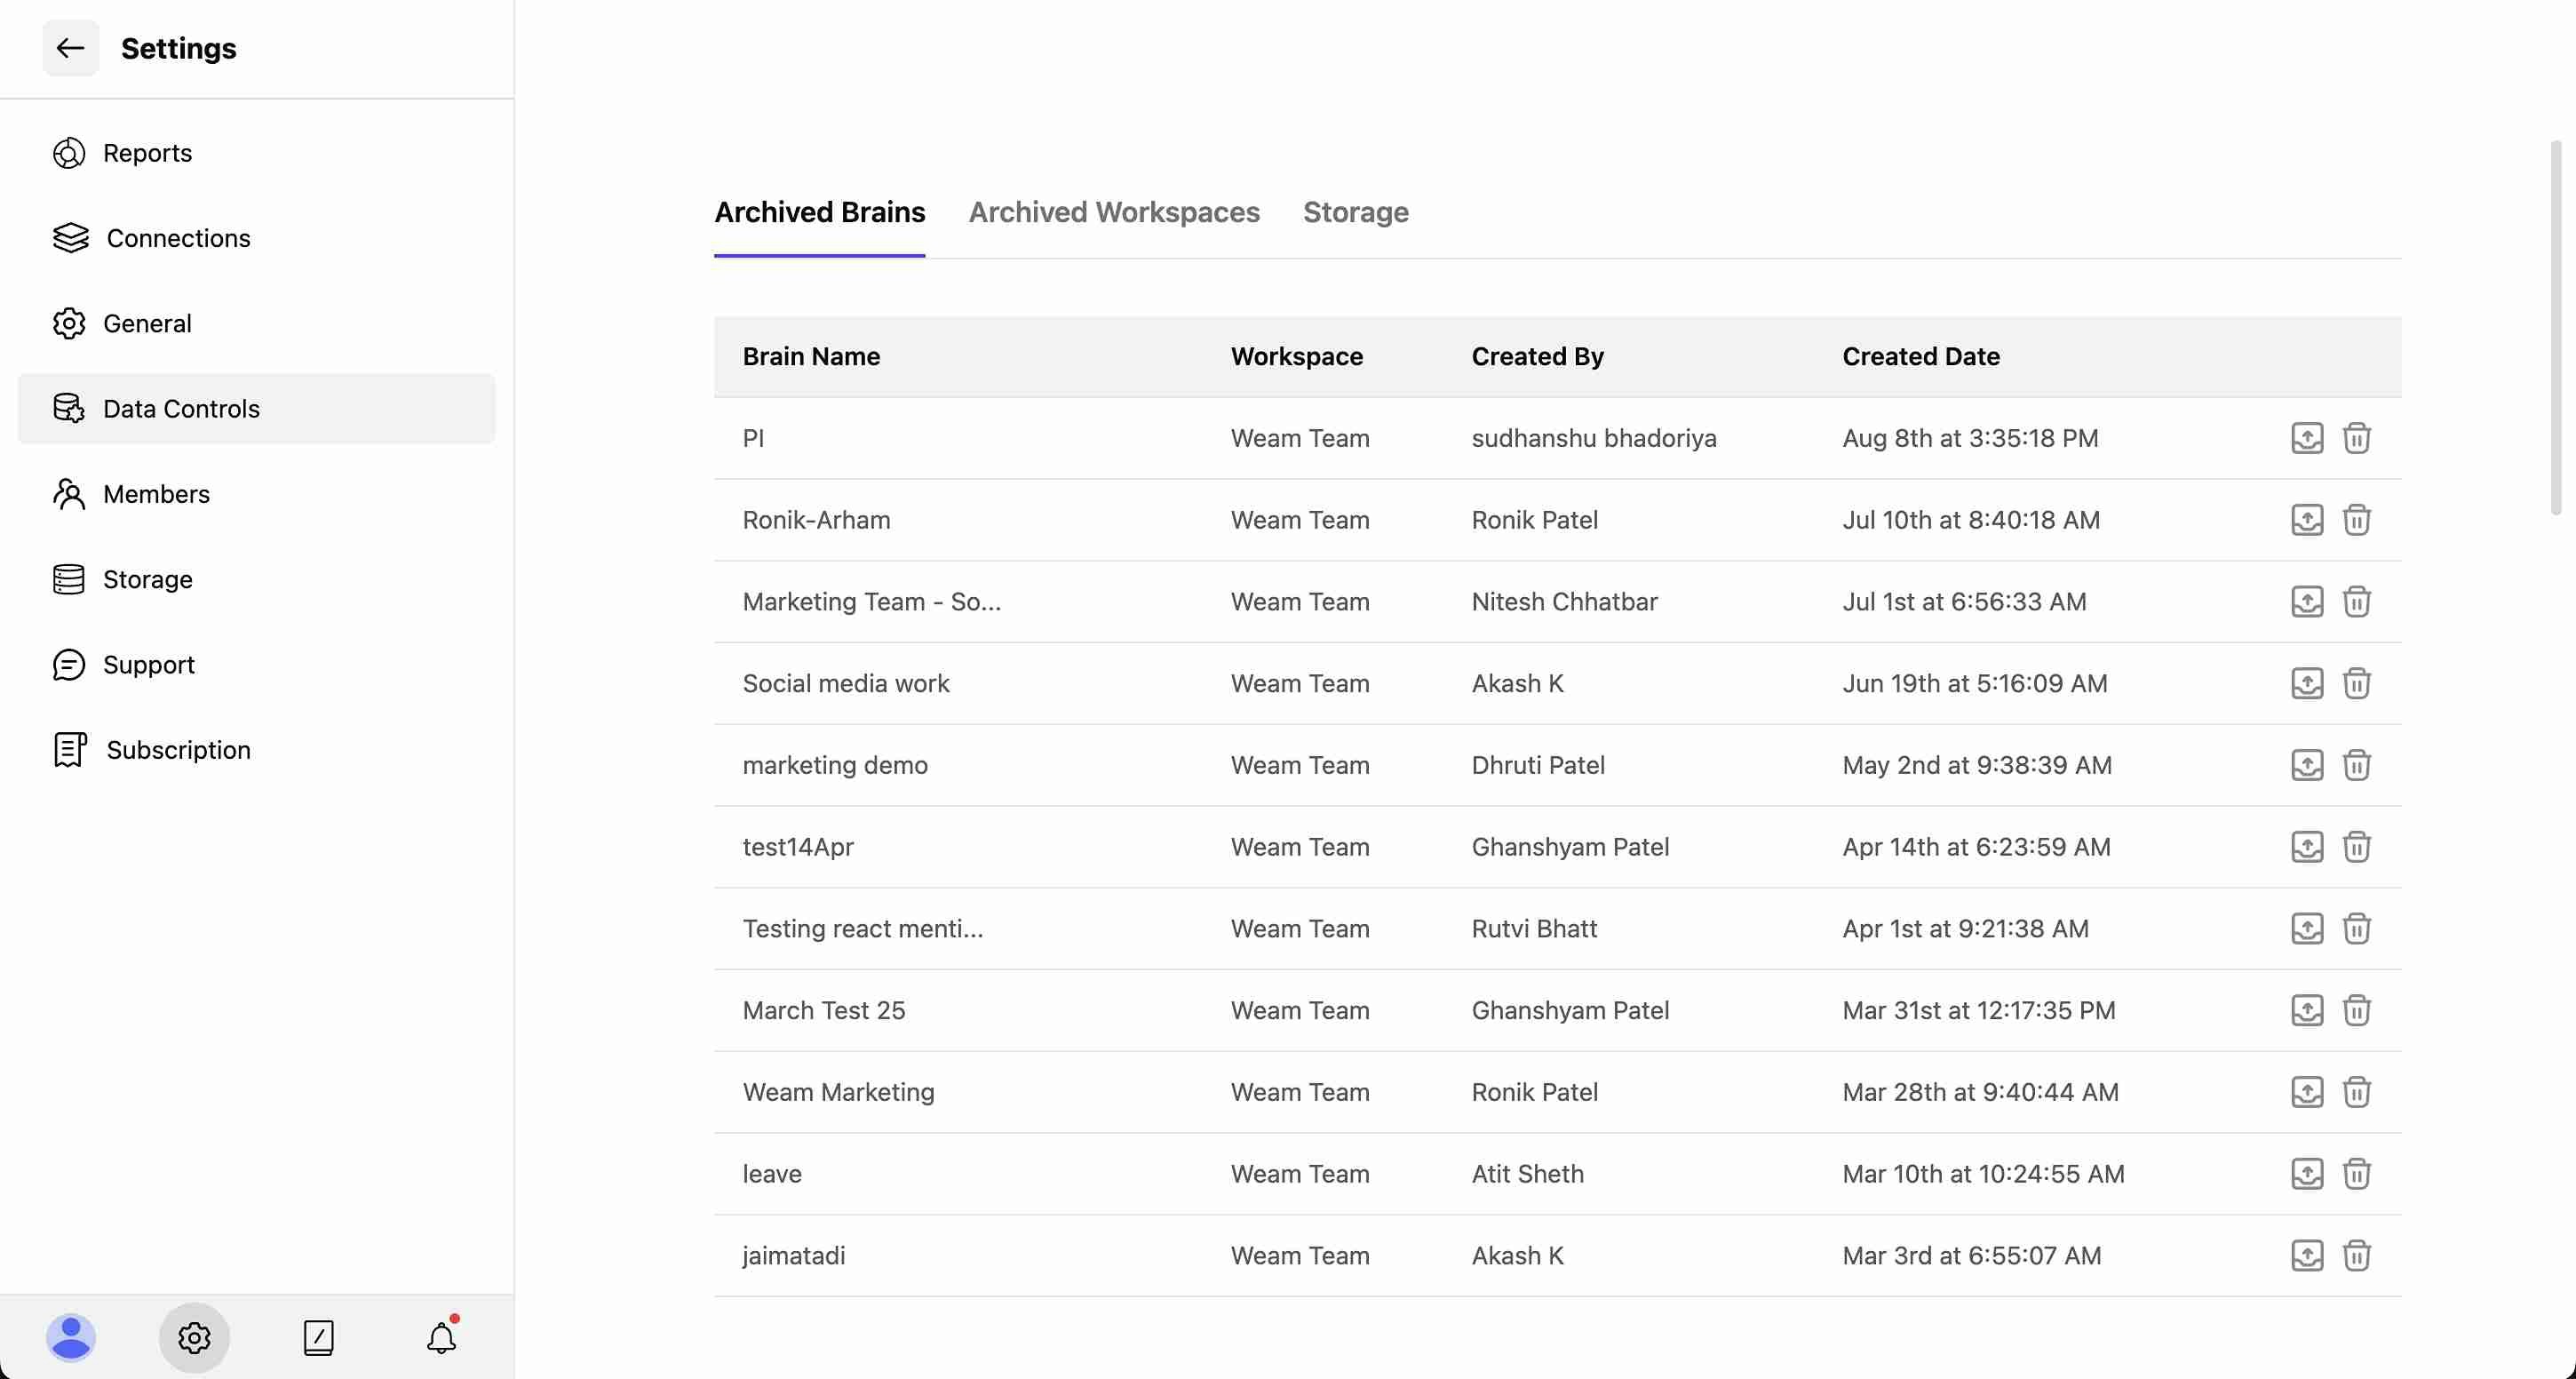
### Brain Lifecycle Management
#### Archiving Brains
1. Access Brain management through the three-dot menu
2. Click "Manage" to open Brain details
3. Use the red "Archive" button to archive the Brain
4. Archived Brains move to the Data Control section in Settings
#### Member Management Features
**Add New Members**
* **Search Members**: Use search bar to find specific users
* **Add Member**: Button to include individual users
* **Add a Team**: Button to include entire teams
### Brain Lifecycle Management
#### Archiving Brains
1. Access Brain management through the three-dot menu
2. Click "Manage" to open Brain details
3. Use the red "Archive" button to archive the Brain
4. Archived Brains move to the Data Control section in Settings
 #### Renaming Brains
1. Click the three-dot menu next to the Brain name
2. Select "Rename" from the dropdown
3. Enter the new Brain name
4. Confirm changes to update the Brain name
## Administrative Controls
### Access Management
* **Member Control**: Add or remove team members from Shared Brains
* **Team Integration**: Include entire teams in Brain access
* **Permission Settings**: Manage who can view and contribute
* **Privacy Options**: Control between Personal and Shared access levels
#### Renaming Brains
1. Click the three-dot menu next to the Brain name
2. Select "Rename" from the dropdown
3. Enter the new Brain name
4. Confirm changes to update the Brain name
## Administrative Controls
### Access Management
* **Member Control**: Add or remove team members from Shared Brains
* **Team Integration**: Include entire teams in Brain access
* **Permission Settings**: Manage who can view and contribute
* **Privacy Options**: Control between Personal and Shared access levels